QuickBooks Error 12031 triggers during updating your QBs desktop software to its latest version. It occurs due to the network timeout. As a result, you are unable to connect with your server. Also, when your firewall security system configuration isn’t set to the default or has some misconfiguration, you might experience this error. When you face this error 12031, you receive the error messages that show:
Error 12031: A network timeout that is preventing QuickBooks from accessing the server.
In this article, we are going to mention the reasons along with its solutions that will help you to resolve the QuickBooks error 12031.
Table of Contents
What are the Causes of QuickBooks Error 12031?
We have listed all the causes of Error 12031 QuickBooks here. You can check them out to avoid this error from happening in the future.
- The improper firewall might be blocking the functioning of QuickBooks.
- Your internet connection could be weak.
- Third-party antivirus could be causing havoc.
- Improper SSL settings can also lead to this error.
Now that we know about this error and its causes, it is time for us to figure out the solutions to this error. Let’s see them.
Also Read: Easy Soultions to Resolve Quickbooks won't open Issue
Things to do Before Applying Solutions
- Fulfill your hardware and software requirements.
- You need to have a good internet connection.
- Update your Windows OS and make sure that your Os is compatible with your system.
- Verify whether your QBs software is the latest version or not.
- Create a backup file of your QBs company file.
Steps to Create a Backup File
Follow the below-mentioned steps to create your company backup file to prevent any data loss.
- First of all, open your QBs desktop software.
- Then, go for the option File menu.
- Now, single-click on the option Backup Company.
- Next, select the option Create Local Backup. The backup dialogue box appears on the screen.
- After that, single-click on the option Local Backup.
- Thereafter, hit the Next choice.
- Single-click on the Browse option to find the path to save your backup file.
- Once done, single-click on OK.
- Thereafter, hit the option Save it now.
- Finally, hit the Next button to begin the backup process.
How to Fix QuickBooks Update Error 12031?
You must follow each method until you find the solutions that work out for your case. Also, create a backup of your company files to avoid data loss.
Solution 1: QuickBooks Connection Diagnostic Tool
This is a dynamic tool that is capable of fixing the QuickBooks connection issues.
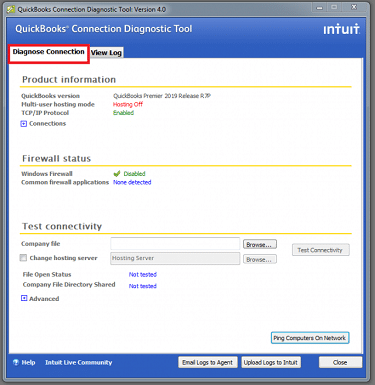
- First of all, download the QuickBooks connection diagnostic tool.
- Next, install it by clicking on the downloaded file and following the on-screen instructions.
- Launch the tool by clicking the desktop icon.
- In the test connectivity section, select the option to browse. You can find it beside the company files bar.
- Simply select the company file in which you were having the issue.
- Hit the Test Connectivity button.
- The repair will start immediately. You just have to wait till it is done.
Solution 2: Setup Internet Connection
Here we mention the steps that will help you to set up your internet connection.
- To do this, open the QuickBooks desktop application on your computer.
- Now, click the help tab from the upper pane.
- Select Internet Connection setup.
- Next, you have to choose the option named “Use my computer’s Internet connection settings to establish a connection when this application accesses the Internet”.
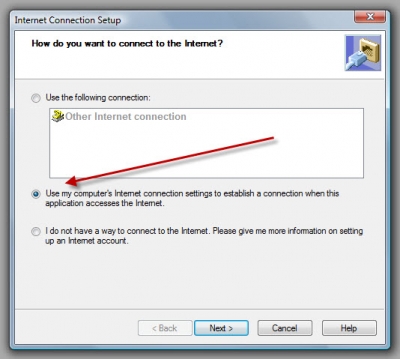
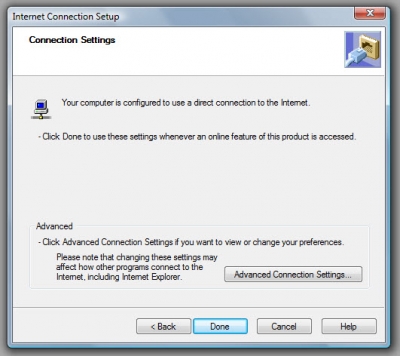
- After that click on the Next button. Finally, click Done.
- You will have to update your QuickBooks software if you have not done that already.
Solution 3: Rename the Network Data File
- Initially, you have to open the folder in which the QuickBooks company file is located.
- Here, you spot the ND file. It is easy to locate this file because it will have a .nd file extension.
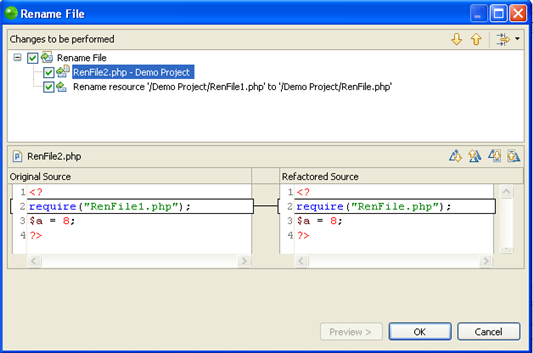
- Next, simply right-click the Network Data file and select the rename option.
- Put old in the name of the file. For example comanyfilename.qbw.nd.old
Solution 4: Update QuickBooks
If you have already processed the latest version of QuickBooks. You can skip this solution. Otherwise, here you can see how to download and install the latest version of QuickBooks. It is important to upgrade your Qb software because has many bug fixes which in turn can solve your issues.
- Firstly, launch the QuickBooks desktop. Now, choose the help menu.
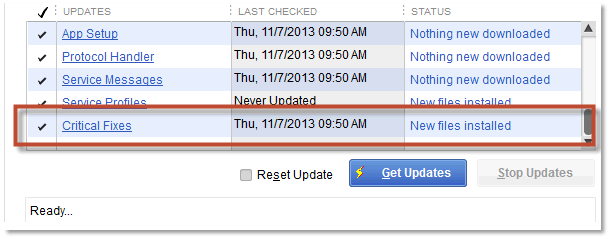
- Now, click on Update QuickBooks.
- A list will appear in front of you. You have to select the latest version from this list.
- Restart your computer after the installation is complete.
Solution 5: Cease Third-party Applications
Third-party applications like the antivirus tend to block the working of QuickBooks. This is because antivirus considers the basic functions of QuickBooks as malicious. So, you either have to disable the third-party application or you have to uninstall it till this error is rectified.
Solution 6: Update your windows

Windows update has a lot of bug fixes and additional features in it. So, you must update your windows operating system.
Visit Here to know: What is quickbooks error 3371
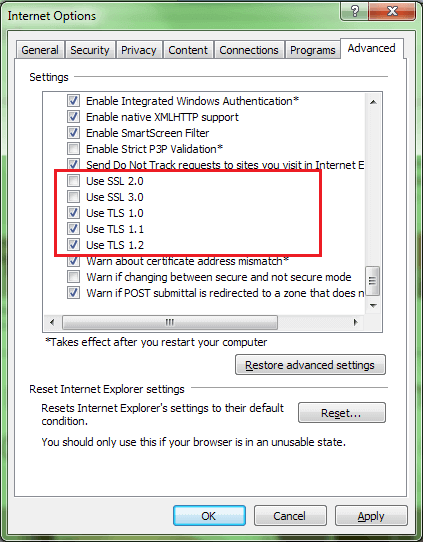
Solution 7: Configure SSL and TLS
These settings are very crucial for the connectivity of QuickBooks. To do this, first of all, open up internet explorer. Next, open internet options. navigate to the advanced tab on the upper pane. Modify the TLS and SSL settings as per the image given below. Finally, hit Ok.
Wrapping Up!
We have mentioned the causes that can help you to prevent the QuickBooks Error 12031 in the future. We also provided you with some amazing and effective troubleshooting methods that can surely resolve your error 12031. Hopefully, they were useful in eradicating your error.
Frequently Asked Questions
Q1.How do I enable TLS 1.2 in QuickBooks?
To enable TLS 1.2 in QuickBooks, you will need to follow the steps outlined below.
- First, access the QuickBooks Tool Hub & go for the installation issues tab.
- Next, choose the QuickBooks TLS 1.2 Tool.
- Choose to agree to the EULA Agreement.
- After agreeing to the terms, select run to start the process of enabling TLS 1.2.
Q2. How do I know if my QuickBooks file is corrupted?
There are a few signs that you can look for to see if your QuickBooks file is corrupted.
- First, check to see if you are able to open the file. If you can’t open the file, or if it takes a long time to load, then it is likely corrupted.
- Another sign of a corrupted QuickBooks file is if you see error messages when trying to perform certain tasks, or if the program crashes unexpectedly.
If you suspect that your QuickBooks file is corrupted, then it is important to run a data repair utility as soon as possible. This will help to fix any corruptions and prevent further data loss.