
QuickBooks accounting software has tons of features to help businesses and one of them is Quickbooks loan manager which helps users track their loans. Besides tracking loans, the loan manager QuickBooks 2022 also assists users in tracking their repayment amount, payment schedules, interest, and principal installment for a specific period. Thus, it handles everything to run your business really well and efficiently.
But many people are unaware of the loan manager in QuickBooks and its tremendous benefits for their businesses. So, we will explore it all in this article. Thus, you just need to stick to this article till the conclusion.
Table of Contents
QuickBooks Loan Manager: An Overview
The loan manager QuickBooks 2022 is a tool for keeping track of overdue QuickBooks loans and assists in calculating interest. The following are some of the main features:
- This tool simply divides the entire loan amount into interest & principal and helps in the timely repayment of the loan.
- It enables you to add and remove loans that need to be tracked, as well as set up loan payments for them.
- Also, it allows you to examine any payments and evaluate the loans.
Installation of QuickBooks Loan Manager
To set up the loan manager QuickBooks 2022 it is necessary to create a liability, vendor, and expense account. Thus, follow the below steps to create such accounts. Also, keep in mind that the whole process usually takes an approximate time of 30 minutes.
Step 1: Create a Liability A/c
To set up a liability account, you need to properly follow the below steps:
- At first, select the List menu and then hit COA.
- Then, after selecting the menu, click New Tab.
- After that, hit on Loan and choose the Continue button.
- Also, provide the account name and initial balance.
- Lastly, you need to hit OK and then press Save it.
- Also, click on the Close tab.
Step 2: Set up a Vendor
To set up the vendor account, the steps are outlined below:
-
- First, press the Vendor menu and then press Vendor centers.
- After that choose New Vendor.
- Also, enter all of the necessary information and then hit OK.
Step 3: Create the Expense A/c
For creating an expense account, follow the below steps:
-
- In order to keep track of interest payments, fees, and charts, first, navigate to Lists and then to COA.
- After that, select New from the Accounts drop-down menu.
- Then, tap Expense and select Continue.
- Also, enter the name of the account for interest payments or charges.
- Following that, click Save and then on the Close tab.
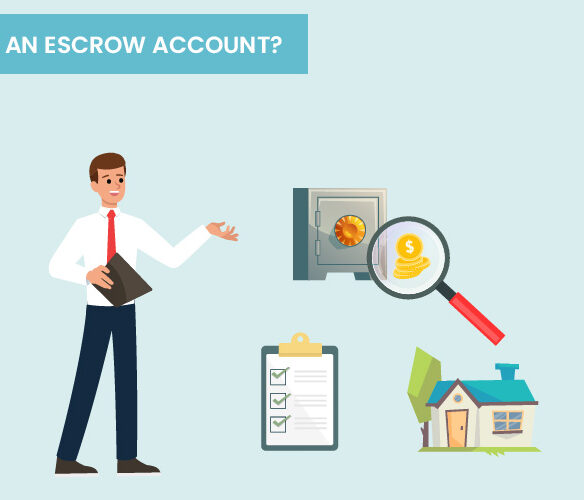
Step 4: Create the Escrow Account
The escrow is essentially a modest amount of money that is held by a separate account until the loan requirements are satisfied. The Escrow account is similar to the QB Asset Account in that it monitors the Escrow component of the payment of a loan.
To create an Escrow account, the steps are given below:
- First, launch Quickbooks then go to the Lists menu and pick COA.
- Now, click on the Account menu, followed by the New option.
- Then, select Other Account Types, followed by Other Current Asset.
- After that, click on Continue.
- Next, you are required to fill in the account name.
- At last, choose Save & Close to complete the step.
Configure Loan Tracking in QuickBooks Loan Manager
Before you can use the Quickbooks online loan manager, you must first set up the accounts and vendors on the QB desktop by following the steps listed below:
-
- First, If no vendor has offered you a loan, create one for a bank/financial institution.
- Next, make a note of the original loan amount as an opening balance or a transaction.
- Include a loan origination date as well.
- If payments have already been paid on the loan, type in these checks, journal entries, or invoices here.
- If there was no previously established account to store Interest Payments and Fees, create one now.
- Now, if necessary, set up an escrow account.
Track Loans and Repayments through Loan Manager in QuickBooks
To track loans and repayments through the Quickbooks online loan manager, follow the below-mentioned steps:
- At first, navigate to the banking menu and select the loan.
- Then choose “Add Loan”.
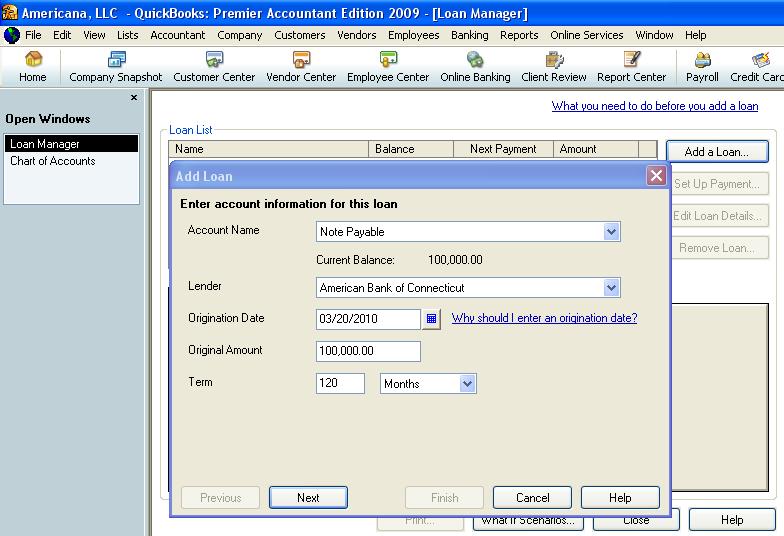
- Next, input the loan’s account information and click Next.
- Account name: Enter the loan account previously made
- Lender: The vendor who will receive payments
- Origination Date: Date from which loan begins or originates
- Initial Amount: The original amount of the loan
- Term: Total time it will take to repay the loan in a specified period
- Now, input the payment information of the loan and hit Next
- Select the Due date of the Next.
- Then, input the amount that is paid in a specific period.
- Also, enter the next payment number.
- Mention the details of the escrow account.
- Last. press the option “Alert me ten days before the payment due date”.
- After inputting the loan interest information, click the ‘finish’ button.
- Enter the loan’s interest rate.
- Also, input the compounding time.
- Then enter the bank account information from which you will repay the loan.
- After that, the interest expenditure A/C will be used to track the interest.
- At last, fill in the charges or expenses or fees.
- If you want to change something, click ‘update loan information. The loan data is in the Summary tab at the bottom of the loan manager Quickbooks 2022.
The Scenarios Tool
You may experiment with different payment amounts, and repayment terms using the “What if scenarios tool.” In order to utilize it, you must complete the instructions outlined below:
- To begin, go to the ‘What If Scenarios’ menu.
- Then, from the ‘Choose a scenario’ page, you may pick any of the two “How much to pay with a new loan” options.
- Then, under the Choose a loan drop-down, choose a loan choice to work with.
- Fill in the loan requirements and click Calculate to get the results.
- In addition, you may print the findings by clicking on the print button.
- Finally, when completed, select OK to shut off or close.
Wrapping Up!
We believe this comprehensive guide will assist you in managing and tracking your loans through the Quickbooks online loan manager. However, if you face any issues, you may connect with the relevant technical team for further assistance.