QuickBooks Multi-user mode is a kind of feature which is inbuilt in QBs that helps many users to utilize the same file which is already in use by other users. The mode of multi-user improves productivity & collaboration. However, if you want the authority of accessing this feature that helps you to work on the same file altogether, you need to have the license of QuickBooks which is required to log in. However, we already know that QuickBooks is very strong and usable accounting software. But still, users can face the error frequently. One such error is “QuickBooks Multi-User Mode stops working”.
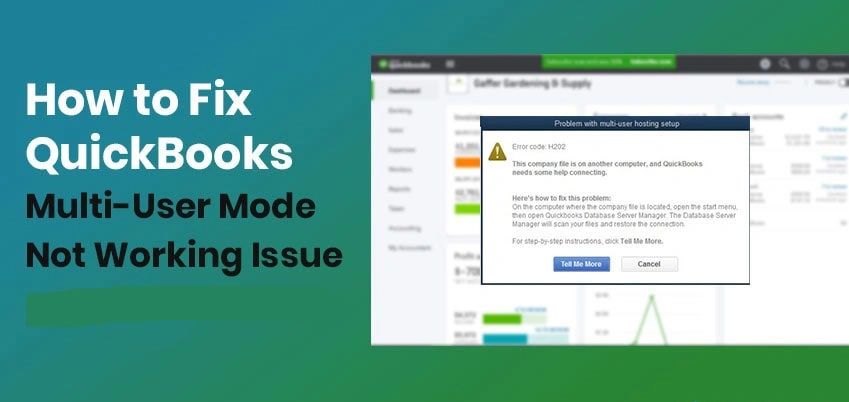
It occurs when you are trying to run the file of a company that is available on another computer system. However, when you receive this error, you see a message like “QuickBooks Multiple-user Mode not working”.
In this article, we will provide you with detail about this error, its causes and symptoms, and many more. You will also find the different troubleshooting methods through which you will be able to fix the error.
Table of Contents
About Mode of Multi-User Not Working in QuickBooks
Mode of Multi-user is a feature in QuickBooks. This feature allows multiple users to execute the task on a similar company file simultaneously. You can access the feature only when you have the license of QuickBooks on their work platform. QuickBooks has such an important feature but sometimes this feature is not working properly. You can’t find this feature all the time very smoothly. When the mode of multi-user stops working, then you will receive the error called “Multiple-user mode not working”.
This error is also famous for the name QuickBooks Error H202. There are many reasons for the occurrence of this error but the main reason is the location of the company file that is used while working is lost. It also occurs when you lost the company file from the server and you did not save it there.
Reason Behind QBs Multi-User Mode Not Working Error
We mentioned some of the reasons behind the mode of multiple-user errors that are helpful for you to identify the issue and resolve them correctly:-
- QuickBooks may not be installed on a server.
- When the configured hosting setting is inappropriate.
- The anti-virus or software firewall may disturb communication b/w user computers.
- Corrupted and damaged.ND files.
- The server of QuickBooksDBXX is not started.
- QBs database server manager isn’t installed on server PC .
- When the Window file was not set correctly.
- To open QuickBooks company files, the database server doesn’t have permission.
Troubleshooting Methods For Mode of Multi-User Not Working
There are some easy steps to resolve the ‘QBs multi-user mode not working error’ and follow all the steps mentioned below correctly:-
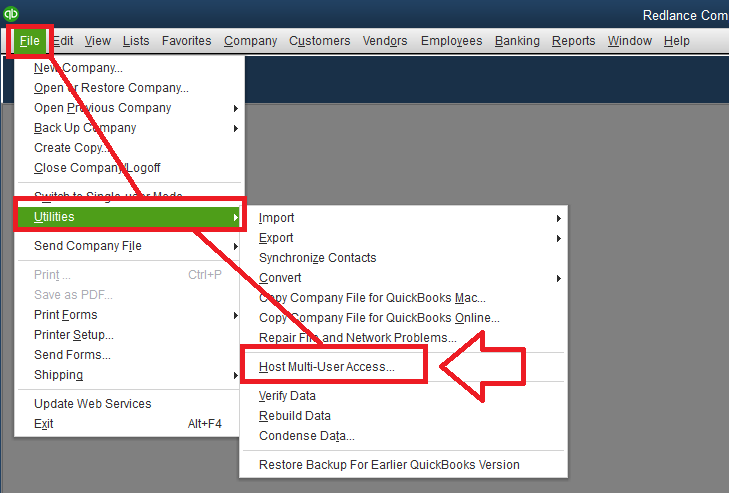
Method 1- Switch to Multi-User Hosting
- Firstly, launch QuickBooks and update the Company file with the latest version.
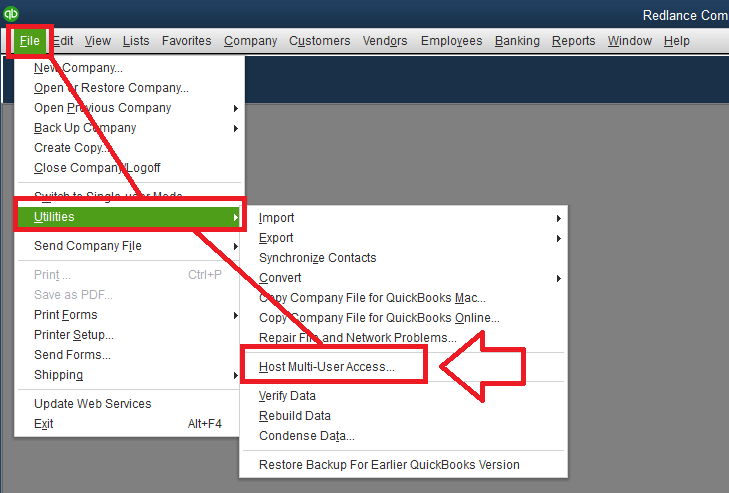
- Locate yourself to the File menu and then to the Utility tab.
- Select the host multi-user access option.
- Follow the previously hosted multi-user setup.
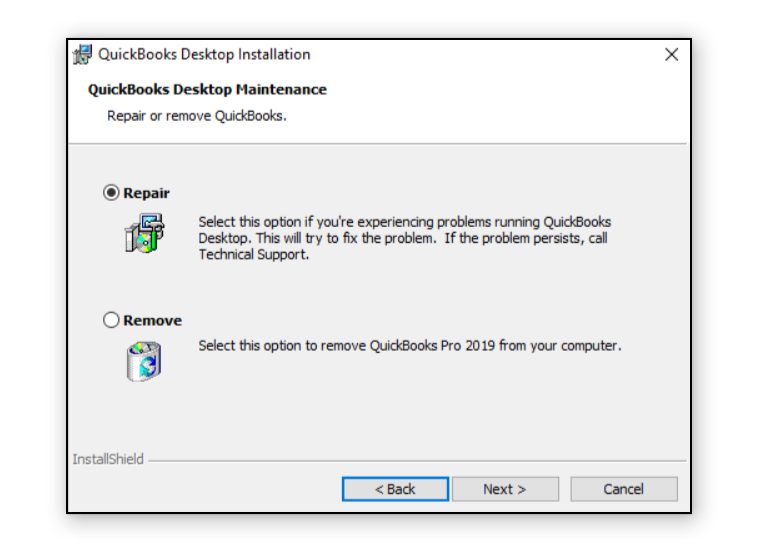
Method 2- Reinstall QuickBooks
- Navigate yourself the start & then move towards control panel.
- From program and features search for the QuickBooks.
- Click on QBs & uninstall the process.
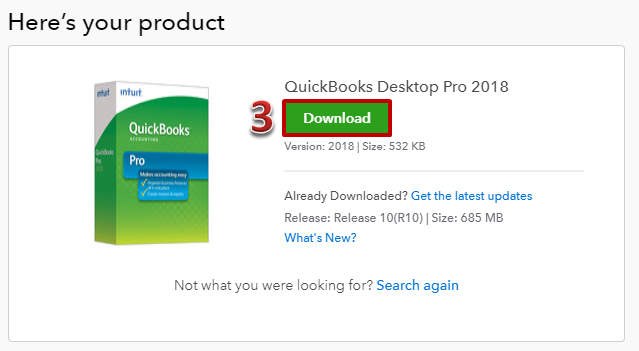
- After that, move towards intuit official website and download the needed version of QBs.
- To switch into it click the Multiple-user mode hosting.
Method 3- Install & Run QBs File Doctor
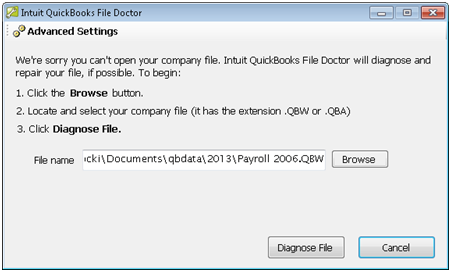
- Go to the official site of Intuit to download QuickBooks File Doctor.
- After that, Run the QBs file Doctor Tool & check whether the error has resolved or not.
Method 4- Default Setting Configuring
- Open your QuickBooks and click on the files tab.
- Now, click on the Utilities & also on host multiple-user access.
- With the company files add the desired number of users.
- If the multiple-user mode is already enabled.
- Now, click on cancel, then it will ask for disabling it.
- At last, you have to create new credentials for several users & complete the setup.
Method 5- Change the Name .QBW.TLG & .QBW.ND file
- Firstly, open the company file on QBs desktop.
- Now, press the F2 button.
- On your computer screen the product info. will open.
- You will locate the .TLG & .QBW.ND file in a similar folder.
- Now, rename the files.
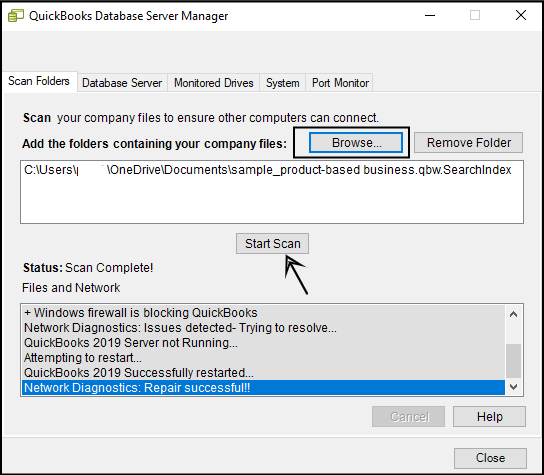
Method 6- Use QBs Database Server Manager
- Click on the Start & then move to the QDSM.
- Locate the folder locations and In case you are not able to navigate then use Browser where company files are saved.
- Click on the Scan button.
- It will fix the permission of the firewall. And check if the mode of multi-user not working error has been solved.
Also, Read- Different QuickBooks Update Error Codes and their solutions
Method 7- Verify the Host Mode
- Firstly, locate t the QBs File menu & then click on Utilities.
- Now, search “Host Multiple-User Access” and click on it.
- Then, to enable single user mode you need to disable hosting.
- Check if the mode of hosting turns off from all the computers.
- Verify that now Multiple-user mode not working error is resolved or not.
Method 8- Ensure that Services of QBs are Running or not
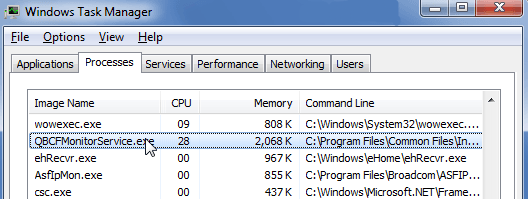
To use the single-user mode to multiple-user mode, check the server of QuickBooksDBYY and QBCFMonitorService is running on PC.
- Go to the Window Search Bar and type service.msc.
- Verify whether service of the QuickBooksDBXX is in the service list or not. When the service is not available then suggest you follow the below steps-
- Make sure that you installed the Database Server Manager on server or not. If you don’t have it already then you have to install the QuickBooks Desktop (different years) & install another Database Server Manager.
- Ensure that hosting will be enabled on the server if the whole program is set on your system.
- Click on the QuickBooksDBXX service. Now, the service of QDBXX started can run.
- You need to choose the restart the services of QuickBooksDBXX after failing several times under the Recovery tab.
- Follow all the above steps again for QBCFMonitorService.
Method 9- QuickBooks is Required to Send the Data
Below are the following steps for QuickBooks to send the data and make sure to follow the steps correctly:-
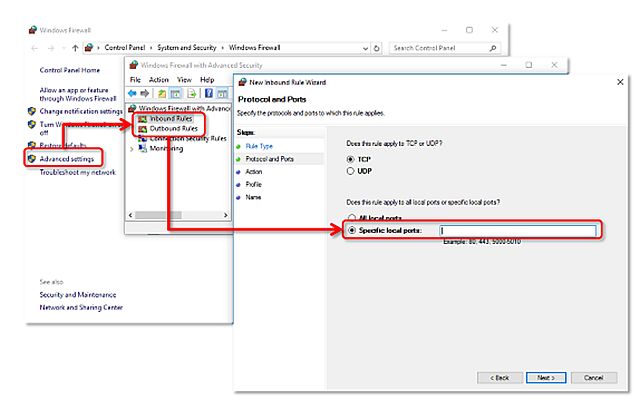
Step 1- Need to Change Firewall And Anti-Virus Setting
- Go to the Control Panel and find the Window Firewall option then click on it.
- Now, Hit prompt to permit the option of ‘an app by windows firewall’.
- Click on the change setting and also hit checkbox under the list of public.
- Then, hit the option of public for application.
- At last, try to launch QBs in the Multiple-user mode.
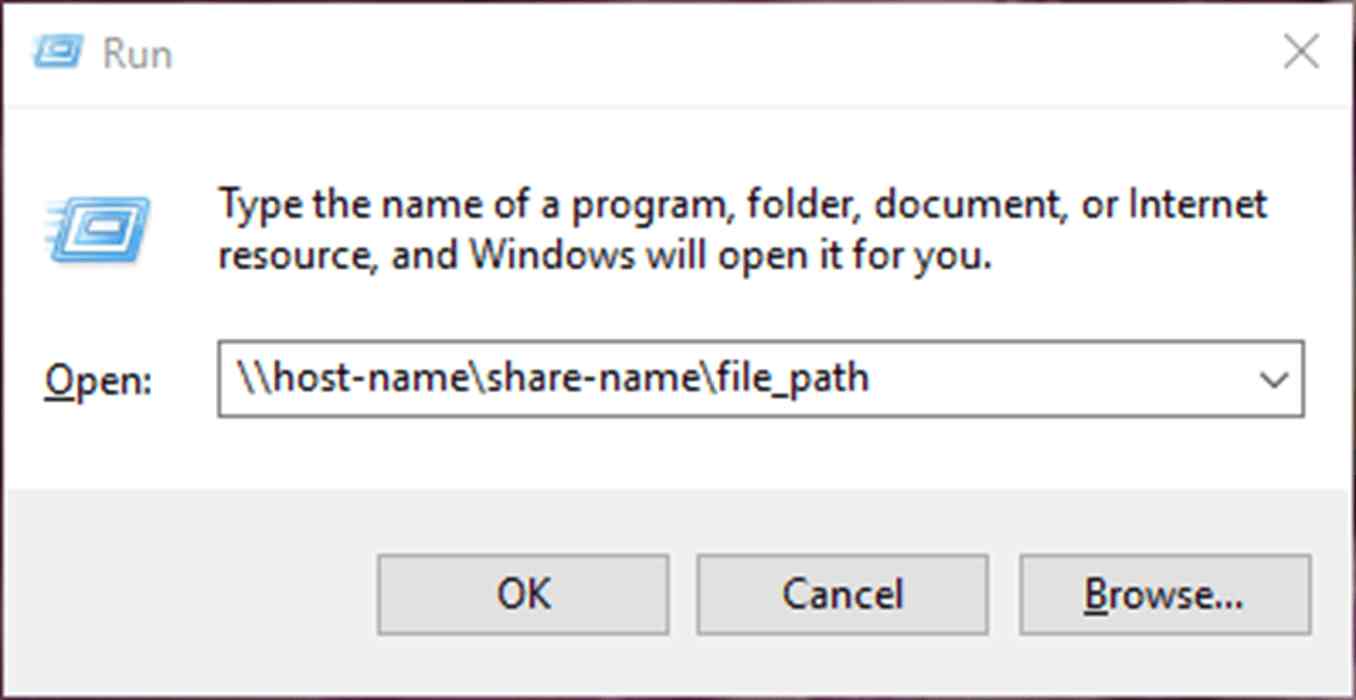
Step 2- Check Path of Universal Naming Convention and Make Sure that QBs can Meet With Server
- Press Window + R together to open Run and then type Ping [name of server].
- You can utilize UNC to reach the folder which is already shared in the server.
Step 3- Go to the Company File by Following UNC Path
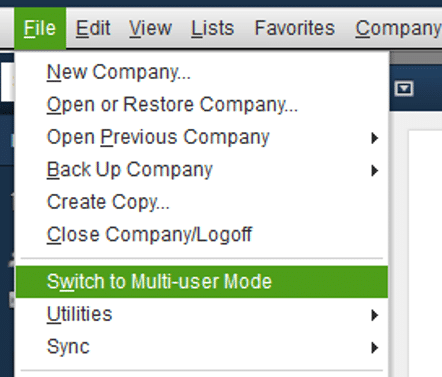
- From the File menu, go to the option Switch to Multi-User Mode.
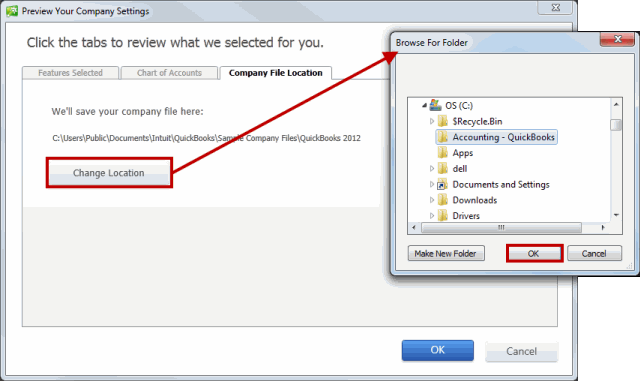
Step 4- Make a New Folder for Company File
- Lastly, you need to make New Folder of Company File.
Method 10- Ping Server From the Workstation
- Firstly, open Start button, and the workstation occurs the error.
- Thereafter, open Network & Sharing Center.
- Click on the Change Advanced Sharing.
- Turn on the network discovery & files.
- Now, get the server name.
- In the Run tab, type CMD and tap on Enter.
- Moreover, In the CMD tab, type ipconfig/all and hit Enter button.
- Thereafter, you will see a severe name next to a hostname.
- Note down the hostname somewhere.
- Now, move to the workstation to test the server.
- Click on start button and open run window.
- In the Run command, type CMD.
- At last, type ‘ping [your name of the server]’ and enter. Then type name of the server without brackets.
Also Read: QuickBooks Has Stopped Working: Definition And Solution
Method 11- In the Window Host file Add Server
- Firstly, use notepad and access the Window Hosts File.
- Now, you will search host file at the path of (C:\Windows\System32\Drivers\Etc\).
- Open your notepad as administrator.
- Type in the address of server’s IP.
- Utilize tab key & then enter the name of server.
- Now, hit the save option.
- Lastly, click on the exit from there.
Also read : Permanent Fixation Methods QuickBooks Error 3371
How to Switch to Single-User Mode in QuickBooks?
There are two conditions under which QuickBooks permits you to log in; the first is “Single-User Mode.” and the other one is “Multi-User Mode.”
However, there are few tasks where QB will not be able to perform without Single-User Mode, as it stops other individuals from changing data while carrying out crucial processes.
If you are working in multi-user mode, you can easily convert to a single user, by following the below steps:
- Log out of all the QuickBooks programs, except yours.
- If you have already not done so, sign in to QB again,
- Next, navigate to the File menu, and select “Switch to Single User”.
After successfully performing the above steps, QB will shut down all the open windows within the program. After that, a message will prompt on your screen stating that QB is now in a single-user mode.
In case, you wish to switch back to Multi-User Mode, locate the File menu and select “Switch to Multi-User”
Final Words!
In this article, we have discussed how to fix “QuickBooks Multi-User not Working” Error. We hope this detailed information will be helpful for you. You can easily follow all the steps that are mentioned correctly to fix this QB Error. Check out our other related posts for more help else you can contact our experts 24*7.
Frequently Asked Questions
Q1.How do I enable multi-user mode in QuickBooks?
In order to enable QuickBooks multi-user mode, the administrator will need to log into the software and select the “File” menu. From there, they will need to choose the “Switch to Multi-user Mode” option. Once QuickBooks has been switched to multi-user mode, additional users will be able to access the software concurrently.
Q2. Why would a company switch to multiuser mode?
If a company wants to allow multiple users to access a company file at the same time, the company file must be in Multi-User Mode. This mode allows multiple users to connect to the file at the same time, and each user has their own login credentials. Once logged in, each user can make changes to the file as needed.

