Just create a liability account and you are all set to record a loan payment in QuickBooks software. A liability account enables you to see interest payments, cash, and non-cash asset on the same account. Also, saves lots of your energy consumed while finding out the transactions. Now, let’s move into and learn how to record loans in QuickBooks.
Table of Contents
Create Liability Account prior to Specify Payment
The user is required to build a liability account if they want to record the loan only on QuickBooks software.
Make a Liability Account
Here is how the user should make a liability account to record loan payments on the QB desktop.
1. First of all, open QuickBooks software.
2. Then, click on the Lists.
3. Choose Charts of Accounts.
4. Thereafter, pick New.
5. After that, choose the appropriate account.
- Other Current Liability Account when the user takes a short-term loan that can be paid within a year.
- Long Term Liability Account when the user opts for a long-term loan that can be paid exceeding the year.
6. Hit the Continue button.
7. Consequently, specify the name and the number for the account.
8. Tap Save and also click Close.
Set up a Vendor Account
A vendor account enables you to meet the payments of the bank and company. Here is how you should set up a vendor account.
- Visit Vendors section
- Choose Vendor Center now.
- Then, hit the New Vendor button.
- Specify the vendor name.
- Also, provide the contact info.
- Hit OK.
Make an Expense Account
The expense account incorporates all interest payments of the loan. The user should need to create it through the instructions:
- Head towards the Lists section
- Subsequently, choose the Chart of Accounts tab.
- Hit New.
- Click on the Expense button.
- Also, choose Continue.
- Thereafter, specify the account name.
- Choose Save and Close button.
The user is all set now to track payments of loans on the QuickBooks desktop.
How to Record Loans in QuickBooks
QuickBooks can record both non-cash cash asset loan methods to track loans. Here is how you should conduct the procedure.
Track a Cash Loan in QuickBooks
1. Pick the Banking section.
2. Choose the Make Deposits button.
3. Thereafter, hit Cancel when you see the Payments to Deposit opens a window.
4. Also, specify the details within the window.
- Visit the Deposit To tab and choose the account where you want to deposit your loan.
- Modify the date.
- Consequently, specify the memo.
- Get into the From Account section and choose your liability account.
- Thereafter, move into the amount section.
- Also, specify the loan amount.
5. Finally, just choose Save and Close button.
How to Put down a Non-Cash Asset Loan in QuickBooks
Make a New Asset Account
1. Head towards the Lists section
2. Thereafter, choose Chart of Accounts.
3. Then, perform a right-click on the space.
4. Choose New from there.
5. Pick the appropriate account
- Fixed Assets: Pick it when the loan asset is categorized into long-term assets.
- Other Current Assets: Choose if for the assets that you can easily convert into cash.
- Other Assets: Click on it when the mentioned above does not meet your requirement.
6. Moreover, choose Continue.
7. Also, specify the number and name of the asset account.
8. Finally, just choose Save and Close button.
Specify Journal Entry
- Pick the Company tab.
- You will see Make General Journal Entries, click on the same.
- Then, click on the Date.
- Also, enter the Entry number.
- Tap Loan asset account and debit it on the first line
- And, Liability account and credit it on the second line.
- Make sure to select Save and Close button.
Till now, the user has created all the accounts required for conducting the tasks. It’s the time for creating and tracking loan payments.
Also Read: How to Reprint Checks in QuickBooks: Learn Effective Methods (2022)
Another Way to Record Loans in QuickBooks
If you seek another easy way to enter the loan payment then try out the automation method. This is helpful for all the users who pay repeatedly.
1. Bring the mouse towards the Banking tab.
2. Choose the Write Checks button.
3. Moreover, choose the dropdown section
4. Further, pick the Banking account that you use.
5. Also, try to examine the Date and Check no.
6. Navigate towards the Pay to the Order of section and choose the bank name.
7. Consequently, visit the Expense option.
- Pick liability account from the initial line of loan repayment.
- Also, click on the Interest expense account from another line.
8. Just click on the Save and Close button.
Note: Features of QuickBooks include memorizing a check that enables you to specify loan payments repeatedly.
Steps to create a Receivable for Loans in QuickBooks
The loan receivables fulfill several tasks. Such as:
- Put down the loan to your Employee
- Track loan to a customer.
- Also, track a loan made to another organization.
The user can track each transaction on their software by creating an asset account. So, let’s move in and learn how to record a loan in QuickBooks.
Make an Asset Account to Record Loan
1. Tap the Lists tab.
2. Further, choose Chart of accounts.
3. Get into the type section and choose an appropriate option:
- Choose Other Current Assets for a loan take more than a year to become settled.
- Alternatively, hit Other Assets if it will be settled within the current year.
4. Thereafter, click Continue.
5. Specify the Account Description and Name.
6. Then, navigate towards the dropdown menu of Tax Line.
7. Later, choose a Tax.
8. Specify the amount of the loan.
9. Thereafter, hit OK.
How to Track Payments for Loan
- Navigate towards the Banking bar.
- Then, choose the Make Deposits button.
- Try to associate the payment with a window titled Payment to Deposit.
- Consequently, specify customer/employee/company whosoever took the loan.
- Now, try to choose the right asset account.
- Specify the amount that the debtor pays.
- Also, choose the debtor’s name.
- Pick the Interest account that you made to track the amount of interest received after repayment of the loan.
- Later, just specify the fee related to the account.
- Finally, click on the Save and Close button.
How to set up a Loan in QuickBooks for Employee
Advance payment methods resolve your query on how to record a loan in QuickBooks software.
- Choose Accounting menu.
- After that, click on the Chart of Accounts button.
- Hit New thereafter.
- Pick the option titled Other Current Assets within the Account type.

- Also, choose Employee Cash Advances on the Detail Type.
- Finally, hit Save and Close.
Not only an employee but you can also set up loans to freelancers, contractors, and an employee.
How to Record Loan in QuickBooks Online
QuickBooks Online provides an easier path to put down the payments for loans as compared to QuickBooks desktop. The user can make a liability account for the loan and the payments.
Creating a Liability Account
This is how the user should create the account for recording loan payments.
1. Tap Settings.
2. Choose the Chart of Accounts section.
3. Now, hit New.
4. Consequently, click on the Account Type.
- Choose Loan Term Liabilities Account to make payment of loan during a fiscal year.
- Other Current Liabilities Accounts should be selected for making payments when the year ends.
5. Thereafter, tap the Detail Type dropdown menu
6. From the list, choose Notes Payable.
7. Specify the Account Name.
8. Also, a description to identify the account.
9. Further, choose the most appropriate options to start tracking the finances.
10. Meanwhile, go to the Amounts section and specify the account balance.
11. Provide the relevant amount of your loan.
12. Convert it into a negative number as it is a liability.
13. Finally. Select the Save and Close button.
Read More : Fix QuickBooks Error 108 Quickly (6 Repairing Methods)
Setup Loan Amount
Now, the time arrives to track the loan receivable amount. Two ways are provided below to help you out.
Way 1: Take Loan Payments into Bank
This is a good option when the user decides to provide loan money to the bank. This option also updates and records the transaction automatically when the bank account is connected to your QuickBooks Online.
Just make sure to reconcile the transactions when the fiscal period ends. The user should consider these steps for putting loan money into the bank.
- Click New.
- Choose Journal Entry.
- Pick the liability account.
- Specify your amount in the credits section.
- Consequently, head towards another line.
- Pick the appropriate bank account for saving the loan.
- Move towards the debits tab and choose the loan amount.
- Just click on the Save and Close button.
Way 2: Not saving the Loan amount
If the user doesn’t want to save the loan money and use it for their use then try to consult with the accountant. Expert guidance is mandatory as it is one of the difficult tasks that only professionals can handle.
How to Set up Loan Payments in QB Online
- Click on New.
- Thereafter, choose Check.
- Specify the check number.
- For direct withdrawal, use ETF or Debit inside the Check number field.
- Get into the Category section.
- Pick the liability account.
- Specify the amount for loan payment.
- Choose Category dropdown from another line.
- Hit the account for Expense.
- Try to record the loan interest.
- Also, specify the loan interest amount.
- Provide the extra fee on the subsequent lines.
- Finally, just choose Save and Close button.
Frequently Asked Questions (FAQs)
1. How to specify a PPP (Payment Protection Program) forgiveness loan on QuickBooks desktop?
- Tap the Accountant menu.
- Thereafter, choose Chart of Accounts.
- Hit the drop-down menu of the account.
- Then, choose New.
- Click on the Bank Radion tab.
- Hit Continue.
- Specify the name of the PPP loan fund.
- Further, tap on the sub-account and bank account.
- Just click Save & Close tab.
2. How can I record a forgiven employee loan in QuickBooks?
- First of all, hit the Settings button.
- Thereafter, choose Chart of Accounts.
- Tap the upper left menu.
- Make sure to click on the appropriate account type.
- Then, click on the Loans to Others.
- Specify the name of your customer.
3. What are the steps to categorize a loan payment in QB online?
- To initiate, tap the plus icon.
- Choose the Expense button.
- Head towards the payee field.
- Also, specify the business or institutions that provide the loan.
- Click on your bank account.
- Further, specify the payment date.
- Head into the drop-down menu and select the payment method.
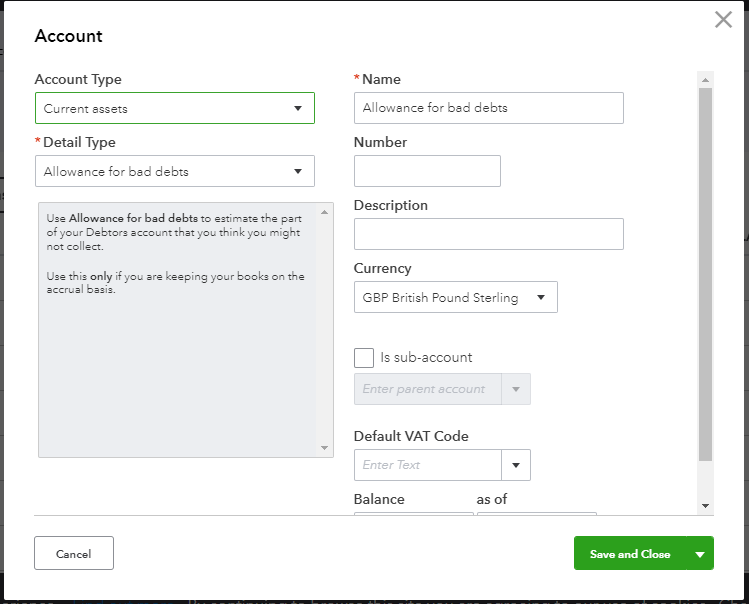
4. How to write off the loan amount in QuickBooks Online?
- Make sure to examine the aging of the account receivable.
- Thereafter, make a bad debt expense account.
- After that, build a bad debt item and credit memo.
- Also, try to apply the credit memo.
- Finally, just run the report.