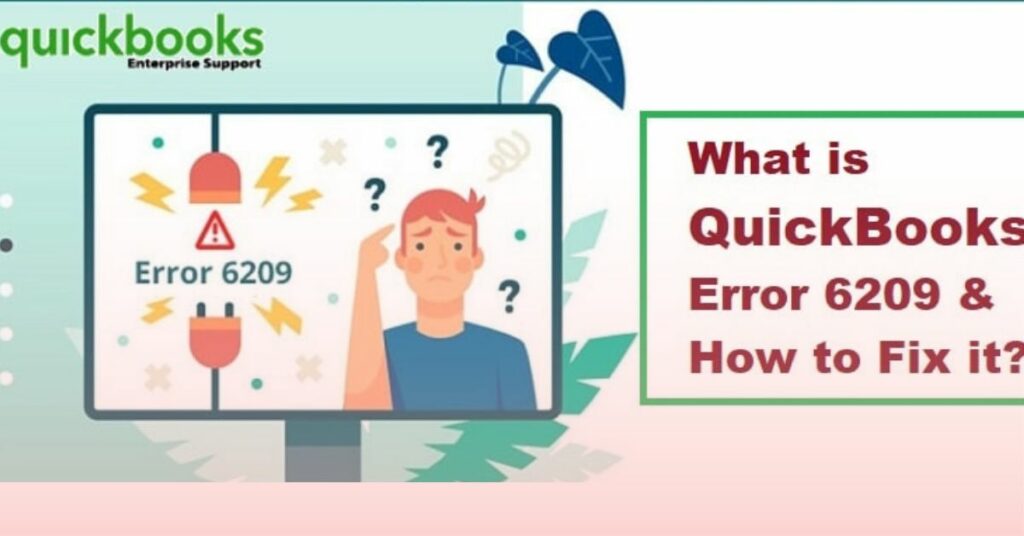
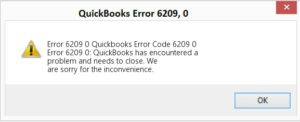
QuickBooks Error 6209 occurs when you are trying to install QBs, update windows or access the company files. The QuickBooks error code 6209 0 also happens in QuickBooks Desktop versions with Windows OS. As a result, you may get the warning messages that state:
“An error occurred when QuickBooks tried to access the company file. Please try again. If the problem persists, contact Intuit Technical Support and provide them with the following error code: 6209.”
In this article, we are going to mention some major reasons and symptoms that affect your system after the occurrence of the QuickBooks Error 6209. We will provide you with some effective methods of troubleshooting that will easily resolve the 6209 error QuickBooks in just a few clicks. Let’s get straight into the article.
Table of Contents
Causes Behind the QuickBooks Error 6209
QuickBooks error 6209 falls under the 6000 series code of QuickBooks. When this error occurs, there might be some direct reasons for the QuickBooks Error -6209, 0.
- Incorrect System Boot.
- Virus or malware attacks.
- Incomplete installation of QuickBooks.
- QuickBooks components are missing.
Symptoms of the QuickBooks Error 6209
Here are some most notable symptoms of 6209 error QuickBooks.
- The active software crashes.
- While accessing QuickBooks, your screen pops up with the error message “QuickBooks Error Code 6209”
- No command inputs were taken.
Fixing Methods of the QuickBooks Error 6209
There are various different ways to troubleshoot the QuickBooks Error -6209, 0. We are going to provide the basic and important methods. Have a look one by one.
Method 1 – Fix Microsoft .NET Framework
- In the Search field, type up the Control Panel and hit Enter.
- Then, go to Program & Feature.
- Click on Uninstall after Selecting the MS .Net Framework.
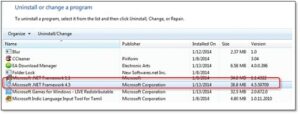
- Go for the option Repair Microsoft.Net Framework & restart your PC.
Method 2- Use Disk Cleanup
There is a built-in tool in Windows that can help you clean up your system and fix QuickBooks Error -6209, 0.
- Press the Windows key + R on your keyboard to open the Run dialog box.
- Type “cleanmgr” (without quotes) and press Enter.
- Select the drive you want to clean up and click OK.
- Disk Cleanup will now scan your drive for temporary and junk files.
- Once the scan is complete, select the files you want to delete and click OK.
- Restart your computer and try opening QuickBooks again.
Method 3- Update QuickBooks
QuickBooks Error Code 6209 0 can occur while updating QuickBooks. The 6209 error QuickBooks is usually caused by incorrect installation of QuickBooks, damaged or corrupt system files, or a conflict with other programs running in the background. You need to update QuickBooks to the latest version to fix this error.
Here are the steps to update QuickBooks:
- Open QuickBooks and go to the Help menu.
- Select Update QuickBooks Desktop.
- In the Update QuickBooks Desktop window, select Get Updates.
- Once the updates are downloaded, follow the on-screen instructions to install them.
- Restart your computer once the installation is complete.
- Try opening QuickBooks again and see if the error still persists.
If you are still facing QuickBooks Error Code 6209, then you can try some of the other methods given below.
Method 4- Use SFC
If you are facing QuickBooks Error -6209, 0, then the first thing you should do is run the System File Checker (SFC) tool. This is a utility provided by Microsoft that can be used to scan and restore corrupt system files on Windows 10. To use this tool, follow these steps:
- Type cmd in the search box.
- Right-click on Command Prompt and select Run as administrator from the context menu.
- In the command prompt window, type SFC /scan now and press Enter to execute the command.
- The SFC scan will now start and it may take some time to complete. Once the scan is finished, restart your computer and check if the QuickBooks Error 6209 is still there.
Method 5- Stop QuickBooks Services
When you start your system, some of the applications start running instantly. As a result, it can harm your system and won’t let you do your task. To stop this issue, you need to follow the below-outlined steps.
- In the Run window, type up services.msc & press Enter.
- Choose the QBCFMonitorservice from the list.
- Right-click on the file and choose the Properties option.
- Select Disabled under the Start-Up type & hit OK.
Method 6- Rename the QB Components Files
To fix this 6209 error QuickBooks, you need to rename all the QB component files and then restart your system. Here are the steps that you need to follow:
- Close the QuickBooks desktop and open the task manager by pressing the ctrl+shift+esc keys together.
- Go to the processes tab and end all the QuickBooks-related processes.
- Now, open windows explorer and go to C:\ProgramData\Intuit\QuickBooks(year)\Components folder. Here, you need to find “.TLG” and “.ND” files.
- Rename all these files by adding old ones at the end of their names. For example, qbw32.tlg will become qbw32old.tlg.
- Now, restart your system and open QuickBooks again to check if the error is fixed or not.
Method 7- Use QB Install Diagnostic Tool
The QuickBooks Install Diagnostic Tool is a powerful utility that can fix many common QB installation and setup errors. Here’s how to use it:
- Download the QuickBooks Install Diagnostic tool.
- Save the file to your desktop and then double-click the qbinstall_tool_v2.exe file to run it.
- Reboot your computer after the diagnostic tool completes its repairs.
Method 8- Update Certificate of Microsoft Security
QuickBooks Error 6209 generally occurs due to the presence of an outdated Microsoft security certificate in your system. To resolve this error, you need to update your Microsoft security certificate. Here are the steps that you need to follow:
- Access the Run command.
- In that box, type “Regedit” and hit enter.
- You must search for the Error 6209-related term.
- Tap on File and choose Export.
- Open the Save In list and select the place where you want the QuickBooks backup key to be created.
- Rename your backup file by clicking the File Name.
- Select the Selected branch from the Export Range.
- Choose the Save option.
- Save the file with the. reg extension.
If the error persists, then proceed to the next step.
- Press the Windows + R keys on your keyboard to open the Run window.
- In the Run window, type “Control” and press Enter. This will open the Control Panel window.
- In the Control Panel window, click on “View by” and select “Large icons”.
- Now, click on “Internet Options”.
- In the Internet Options window, go to the “Security” tab and click on the “Trusted Sites” icon.
- Click on the “Sites” button and uncheck the box next to “Require server verification (HTTPS:) for all sites in this zone”.
- Now, add https://*.intuit.com to the list of trusted sites and click on the “Add” button.
- Click on the “Close” button and then click on the “OK” button.
- Close the Internet Options window and restart your system.
- Now, open QuickBooks and try to access the company file again. The error should be resolved now.
Read More : All You Need To Know About QuickBooks Error 6000
Final Words!
The methods we’ve outlined in this article should help you fix the 6209 error QuickBooks. We suggest following the steps in order, as they are listed. If you experience any difficulties along the way, please reach out to us for assistance. Our team of experts is here to help you get your finances back on track and resolve this issue quickly.