Although QuickBooks is built to make the task easy, users usually face various issues like QuickBooks printing problems. In this guide, we will learn about the major fixations to resolve the issue like using the QuickBooks printer repair tool. Along with that, get to know about the causes. So, if you are struggling with this issue then make sure to get into the post below.
Table of Contents
What is a QuickBooks Printer Repair Tool?
QuickBooks PDF and printer repair tool is built to detect and diagnose errors that appear during the running of the PDF and Print feature. Well, QuickBooks requires components like Print Spooler service, XPS, and MSXML documents. The tool helps in repairing all these components to diagnose issues while printing. The file limit is 23 MB that you can print easily.
Below is provided a full list of all the issues and errors that can be fixed easily with this tool. You can move towards the next section to know them.
Issues Get Fixed with QuickBooks Printer Repair Tool
Any of the printing issues within the QuickBooks desktop can get easily resolved with this one tool. Get into the pointers below to know the list.
- Problems while installing PDF converter
- Printer yielding blank prints
- QuickBooks unrecoverable error
- QuickBooks stops working after clicking on the Print command.
- Unable to save PDF files through QuickBooks.
- The Device is not ready
- Formatting problems while printing
- Not able to print reports, invoices, and checks.
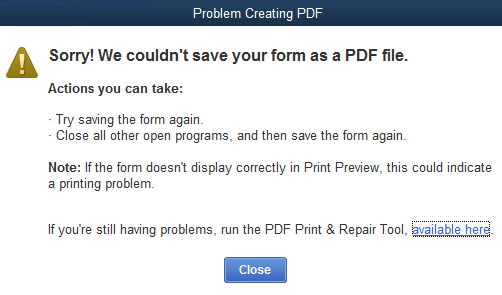
- QuickBooks is unable to create PDF files.
- Print stops responding
- QB could not save your form or reports as a .pdf
- Print Driver Host for 32-bit applications has stopped working
- 1099 form printing problems
- Could not print to the printer
- PDF converter shows offline
If you are facing any issues from the list above. Then, make sure to attempt the troubleshooting till you get rid of this irritable error.
Causes Responsible For QuickBooks Printing Problems
Now, we will get into the causes that are purely responsible for raising these irritable QuickBooks printing problems on the device.
- Not using the latest release of QuickBooks software
- The appearance of text like Device not ready.
- Missing PDF file component
- Print driver host is not working.
- Absence of network connectivity
- The status of the PDF converter is showing offline.
- Installed printer software in the wrong manner.
- The system fails to connect with the printer
- XPS printer driver is missing
- A damaged component does not save your reports or form.
- The tool cannot communicate with the QB file.
- The appearance of the QuickBooks PDF converter activation.
The user is required to try out the following troubleshooting to root out these causes and conduct printing without fault. So, get towards the next section and learn the procedure below.
Also Read : QuickBooks Has Stopped Working: Definition And Solution
Top 7 Ways to Troubleshoot QuickBooks Check Printing Problems
This section will let you know about all those different troubleshooting that you can try and fix the issue. So, let’s just proceed ahead.
Solution 1: Run QuickBooks Printer Repair Tool
First, we will try to use the QuickBooks printer repair tool as it can resolve the damaged and corrupted components within the printer. Below are the steps that you can conduct.
- First of all, close the QuickBooks desktop.
- Now, move towards the official site of Intuit and find out the QuickBooks tool hub.
- Additionally, try to download the tool.
- Once it is downloaded, save the relevant file on the desktop.
- Then, go to the file named QuickBooksToolHub.exe and launch the same.
- Make sure to go through the instructions carefully to install.
- Also, agree to the terms and conditions.
- After the installation procedure ends, just try to launch the tool.
- In case, you cannot find the icon then search the QuickBooks tool hub from the start menu.
- Subsequently, access the tool hub.
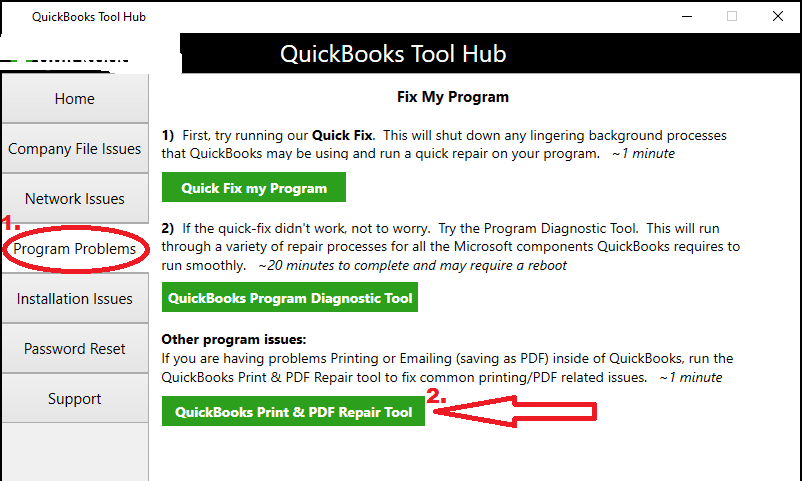
- Thereafter, navigate towards the Program Problem.
- Don’t forget to choose QuickBooks PDF and Print Repair Tool.
- The tool will take some time to run on the device.
- Finally, conduct to print invoices, emails and save the PDF from QB desktop.
Solution 2: Use XPS Document Writer
Move towards this solution, if the issue is not resolved yet. Conduct each step wisely and use XPS document writer.
- Initially, access the workstation.
- Meanwhile, you need to open Notepad.
- Also, write the Test.
- Don’t forget to select the File button.
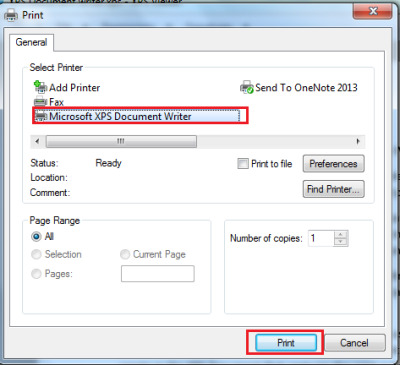
- Simultaneously, choose Print.
- In addition to, tap the XPS Document Writer.
- Hit the Print button.
- Then, enter a filename.
- Head towards the desktop and check if you can print the XPS document or not.
Solution 3: Reset Temp Folder Permissions
The temp folder can lead to the issue if not configured or set properly. Get into the steps below to conduct the following steps.
- Hit the Windows + R buttons to access the Run window.
- Now, enter %Temp%.
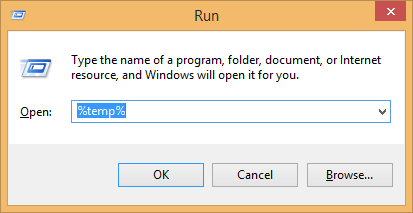
- Choose the Enter button.
- Perform a right-click on the temp folder.
- Furthermore, don’t forget to choose Properties.
- Then, choose the Security button.
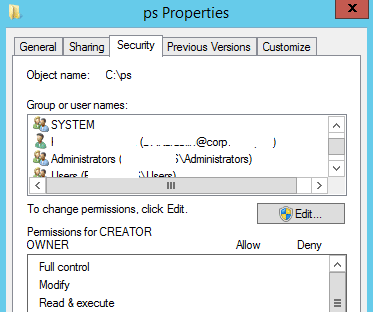
- Enable all user names and groups of the Security tab.
- Simultaneously, choose Full Control.
- Along with that, set the permissions as Full Control.
- Conduct to print a document as PDF in the software.
Solution 4: Rename the Printer File to .OLD
We can also try out this solution that targets the printer file. As it can bring corruption to the QB file. Make sure to carry out the steps below to rename the printer file.
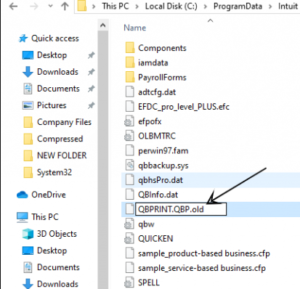
- Firstly, access the QuickBooks folder.
- After that, try to locate the qbprint.qbp.
- Another step is to perform a right-click.
- Subsequently, choose the Rename button.
- Modify and set the file name to qbprint.qbp.old from qbprint.
- Consider the same procedure for another file named wpr.ini file.
Solution 5: Reinstall Microsoft XPS Document Writer
A corrupted Microsoft XPS document writer can be another responsible factor. You can try out the steps below to conduct the procedure on Windows 8, 7, and Vista.
Windows 8
- Move towards the Start menu with the help of the Start tab.
- Make sure to choose Settings.
- Once done, hit the Control Panel.
- Furthermore, choose Devices and Printers.
- Don’t forget to hit the icon titled Microsoft XPS Document writer.
- Also, choose Remove device.

- Next, provide your confirmation with the Yes button.
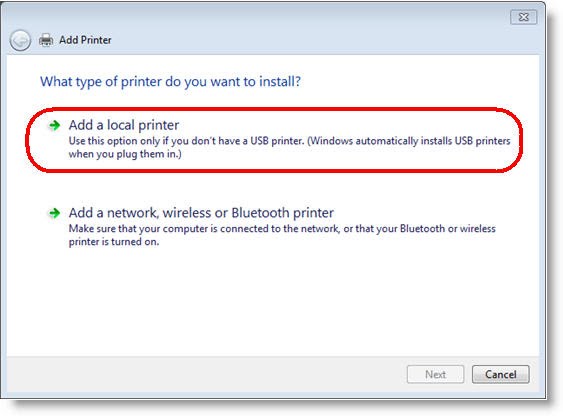
- Navigate towards the toolbar and choose to Add a printer.
- Afterward, select Add a local printer or network print with manual settings.
- Specifically, choose PORTPROMPT from the tab Use an existing port.
- Hit the Next button.
- Click on Microsoft from the manufacturer list.
- Simultaneously, choose Microsoft XPS document writer V4.
- Don’t forget to hit the Next button.
- The user is required to choose to Replace the current driver tab.
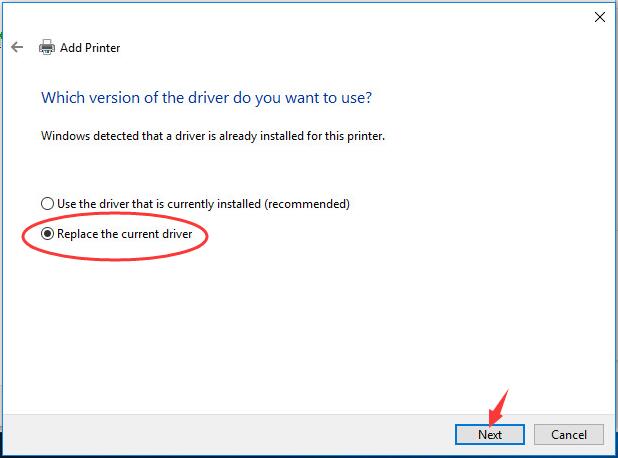
- Afterward, hit Next.
- From the field of Printer name, select the v4 button.
- At last, hit the Finish button.
Windows 7/ Windows Vista
- Begin the procedure by navigating towards the Windows Start menu.
- After that, choose Devices and Printers.
- Now, you need to choose the Microsoft XPS Document Writer icon.
- Then, try to remove the device.
- Provide your confirmation by hitting Yes.
- Head towards the toolbar now.
- Choose to Add a printer button as well.
- Further, try to add a local printer.
- Don’t forget to choose the tab named Use an existing port.
- Accordingly, select XPSPort: (Local Port).
- Again, hit Next.
- Choose the tab named Microsoft, then Microsoft XPS Document Writer v4 from the manufacturer list.
- Additionally, hit Next.
- Finally, choose to Replace the current driver tab followed by hitting Next.
Also Read : Fix QuickBooks error “THE FILE EXISTS” Instantly! [Troubleshooting Guide]
Solution 6: Adjust Windows Permission for XPS Document Writer
This is the last solution in which we try to adjust the permission related to the XPS document writer.
- The first thing that the user needs to do is to create the Printers Control Panel.
- Significantly, perform a right-click on the Microsoft XPS document writer.
- Then, select Printer Properties.
- In the same way, choose Security.
- Go towards the Everyone user group.
- In case the Everyone group is not listed then make sure to hit the add button.
- Later, provide Everyone and select Check Names.
- Certainly, hit OK
- Moving ahead to the C:\Windows\System32\spool on the Windows Explorer.
- Simultaneously, choose Printers.
- Afterward, hit the Properties button.
- Move towards the following tab Security > Edit > Add > Local Service > Enter.
- Try to provide full control access to the Local Service.
- Again, hit Ok.
- Access QuickBooks application
- At last, just build a .pdf file.
Solution 7: Install or Repair MSXML 6.0
The user is now required to install and repair the MSXML 6.0. This also requires different steps. So, head towards the specific steps.
Windows 8
- You will see an icon of the magnifying glass.
- Make sure to tap the same.
- Thereafter, enter a command.
- Similarly, choose Command Prompt.
- Tap the option located on the bottom and select Run as admin.
- Next, provide the password required and then choose Allow.
- Consequently, enter sfc/scannow.
Windows Vista and 7
- Initially, move towards the Windows Start button.
- Now, select All Programs.
- Thereafter, tap Accessories.
- Make sure that you choose Command Prompt.
- After that, tap the Run as Administrator.
- The screen may prompt with filling the administrator password.
- Afterward, provide a password.
- In addition, hit Allow.
- At last, enter the command as SFC/scannow.
So, these are the seven best solutions to resolve the QuickBooks printing problems. If you have a QuickBooks printer repair tool then try to use it first before conducting any of the solutions given above. Whether it be a small business or bigger, everyone needs the printer at once. It has to be taken care of like other devices and software. So, make sure to eradicate all the causes hidden in your printer.