
Journal Entry in QuickBooks is extremely important for all types of business. This is why even experts recommend users create Journal entries for business success. When users create a journal entry, they can save all the sales and transactions records and or transfers of funds between accounts.
To do a journal entry, it is crucial to have good accounting knowledge or a professional who can help you record the entries in QuickBooks. And if you don’t have expert guidance or are new to this accounting software, here are the easiest guide to know “How to make a journal entry in QuickBooks online , Desktop and Mac”.
Table of Contents
Importance of Journal Entry in QuickBooks
Users can enter Journal entries to edit or correct any transactions. You can also create a journal entry to publish the entries that are incapable of performing in different ways, e.g. for-profit or loss adjustments.
The process of creating a journal entry is extremely simple but it needs users to be more focused during the steps. You can create only one journal entry for one customer or vendor at a time. For correcting multiple customer and vendors balances, you will need to create separate entries. Below is a list of all transactions that Quickbooks records as general:
- Company’s credits and debits.
- Money transfer in the income and expense account.
- Easy transactions between income and asset account from the liability, asset, or equity.
Read: How to Fix Quickbooks Error 3371 easily?
A standard rule is that credit and debit should be equal. The Quickbooks general ledger records “Income Statements” and “Balance sheets” as it is the main account group.
Journal entries in accounting include:
- Compound Entry
- Simple Entry
- Closing Entries
- Opening Entry
- Transfer Entry
- Rectifying Entry
- Adjustment Entry
Users create journal entries to complete many accounting associated works, such as:
- Transferring funds
- Entering credits and debits
- Adjusting entry
- Capital contributions
- Loans interest rates
- Depreciation
- Assets to purchase
- Adjustments during financial year’s end
Now that you know about quick books journal entry and its importance for businesses, let’s explore how to make a journal entry in QuickBooks, Desktop, and Mac.
Pointer to Consider when Creating QuickBooks General Journal Entry
- Note that QuickBooks online software doesn’t allow multi-currency within a single journal entry. This means that each currency has its own entry in the QuickBooks online.
- If you make an entry and want to correct the mistake, you can do it by reversing or deleting the journal entry.
- You must check the additional column to see the location and the class while using QBO plus.
- To reflect on “Expenses and Sales”, ensure that your entry contains the A/R or A/P, and the customer’s and vendor’s name.
Other Important Rules to Follow when making Journal Entries:
- Experts don’t recommend creating journal entries to payroll accounts or inventory.
- Additionally, you need a vendor or customer for the entry to account payable as well as account receivable.
- Also, it is essential to use the accounts payable or accounts receivable account in the 2nd line of your journal entry.
- Further, it is recommended to include accounts payable or accounts receivable type account for each entry.
Creating A Journal Entry In QuickBooks Desktop
The steps below explain how to create an entry for general journals within QuickBooks Desktop (Windows):
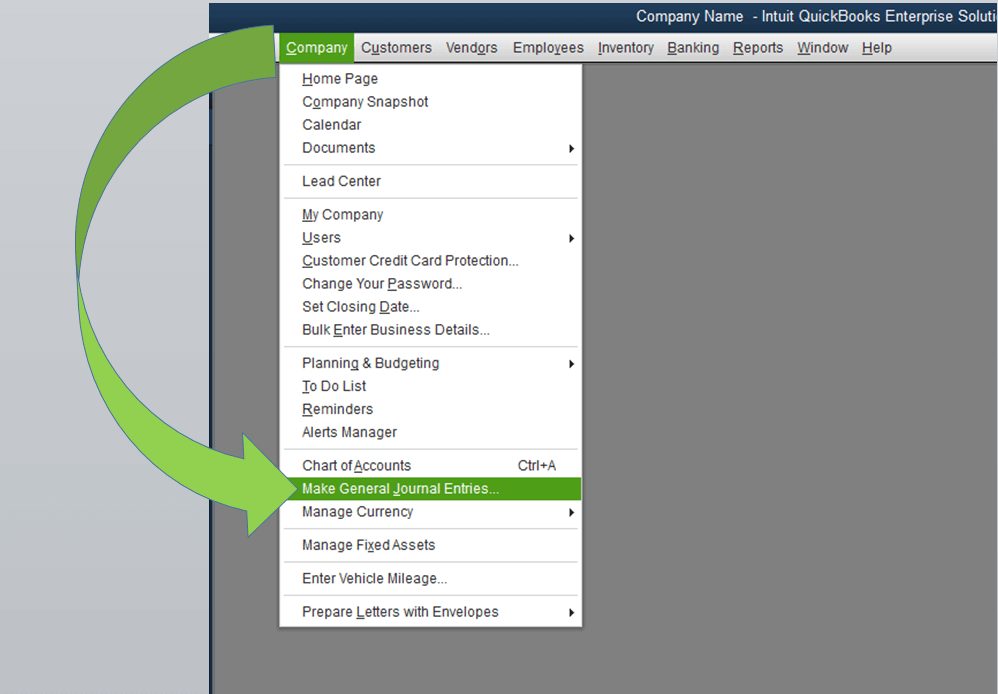
- Firstly, go to “Company”.
- Thereafter, choose “Make General Journal Entries”.
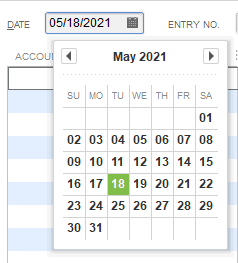
- Then on the same window, edit the date field for recording the entry in a specific financial time period.
- Now, enter a reference number for your journal entries under “Entry Number” after which QuickBooks will number the following journal entries in the correct order.
- Then, enter the general ledger Quickbooks account’s number in the “Account” column.
- Next, you must add the credit or debit amount of the account you’ve selected in the “Credit or Debit” section. Make sure that the credit and debit amounts are the same to allow QuickBooks to process the data correctly.
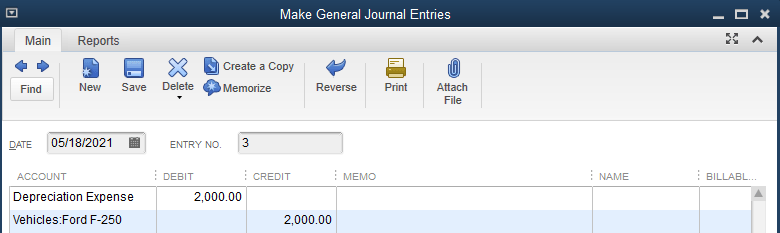
- Then, under “Memo”, write a detailed note about your journal entry. (Optional but could be useful).
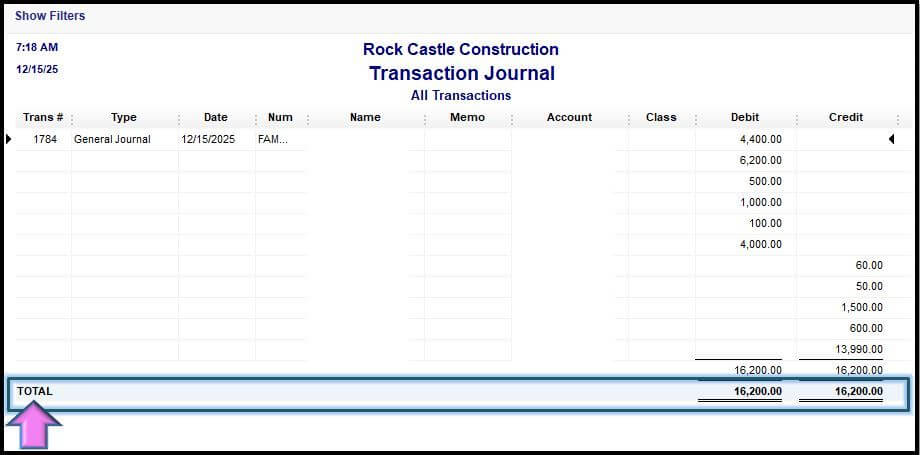
- Repeat the same steps until the journal entries are completely offset. The debit and credit amount must be the same to ensure that the transaction comes at zero balance, and the journal entry Quickbooks becomes balanced.
- Click “Save and Close” for saving the journal entry. Then close the window.
![]()
- To save your journal and open another window, click on “Save and New”.
These steps are your answer to how to make a journal entry in QuickBooks Desktop. If you want to create journal entries affecting a specific vendor’s account payable or customer’s account receivable, then place the customer or vendor on the first line of the journal entry.
How to do journal entry in QuickBooks Mac ?
If you are a QuickBooks mac user, then the journal entry process is quite similar. All you need to do is navigate to “Company”, then create your QuickBooks General Journal Entry by entering the necessary details and saving the modifications. Below are the detailed steps:
- Firstly, open QuickBooks.
- Select the “Company” option.
- Choose the option “Make General Journal Entry”.
- Here, enter the details needed for your journal entry and ensure that your debits and credits tally.
- After completing the above-mentioned steps, simply tap on “Save and Close”
When you are creating a journal entry QuickBooks for your company, ensure that the credit column and debit column amount are equal. To make changes, simply open “Company” from QuickBooks and edit the necessary changes. In the end, tap on “Save” to allow the changes to get saved.
How to make a journal entry in QuickBooks online
QuickBooks Journal Entry is the last section to record all the transactions. When you enter a journal entry in QBO, you can easily transfer money between your accounts to balance the book. Let’s answer the most critical question – How to make a journal entry in QuickBooks online?
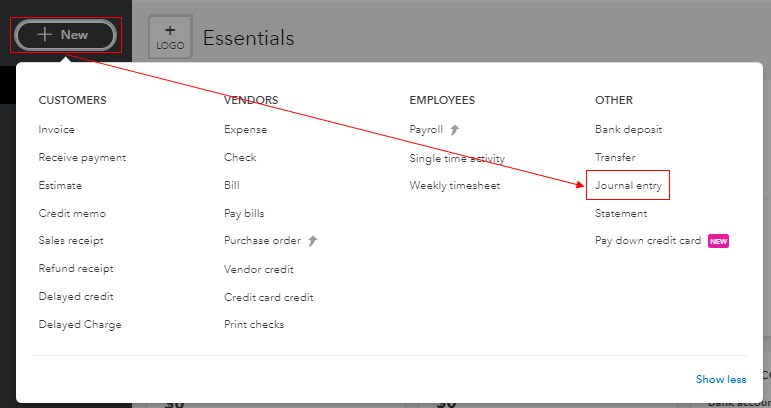
- Firstly, open QuickBooks.
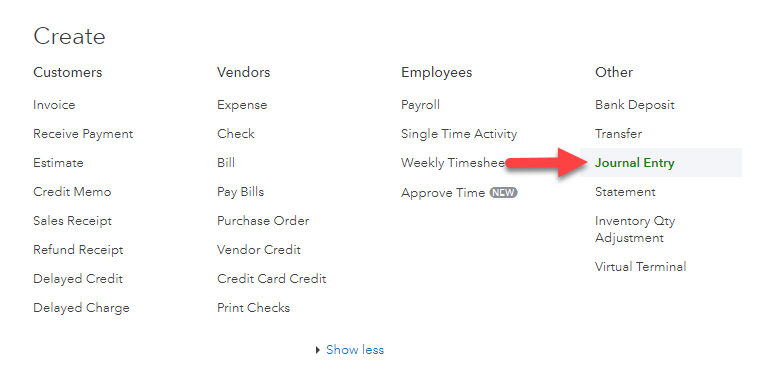
- Now tap on “+New”.
- Thereafter, select “Journal Entry”.
- Start from the first line and select the account from “Accounts”. To Debit or credit the amount, add the required amount in their respective fields.
- Move on to the second line. select another account or another account where you need to transfer the money. Then mention the amount in the exact opposite column. Remember that the debit amount and credit amount have to be the same, so add the exact amount you mentioned in the first line. Make sure to include the same amount as you did to the debit or credit card in the previous line.
- Now, review the amount to confirm that both “Credit”, as well as the “Debit” column, have the same balance.
- Once you’ve completed the entry, start entering your details under “Memo” to remember the reason why you prepared the journal entry.
- Thereafter, tap on “Save and New”. Or you can also click on “Save and Close”.
When you complete the above steps, you will successfully create Quick books journal entries in the online version. You can even make changes in the entry later by using the steps explained below.
How to Edit Journal Entry in QuickBooks Desktop?
If you want to modify the journal entries in QuickBooks due to any reason, the steps mentioned below can help:
- Open “QuickBooks”.
- Click on “Company”.
- Choose “Make General Journal Entries”.
- Tap in the blank area of “Find” and type in the Name, Date, Amount, Entry Number. Then tap on “Find”.
- Then tap twice on the journal entry QuickBooks that you need to edit.
- Tap on “Save and Close” after completing the steps.
- Finally, click on “Yes” to allow the changes to be saved.
Printing a Journal Entry
To print a single journal entry, follow the steps explained below:
- Navigate to “Search Icon” and click “Advanced Search”.
- Now fill in the journal entries. You can add a reference number to narrow the search results.
- Click on “Search” and choose the journal entry.
- Choose the option “More” and pick the “Transaction Journal” from your screen.
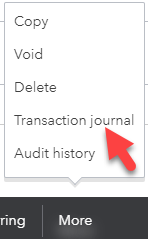
- In the end, click on “Print” to print your journal.
To print several journal entries on a single report, follow the below-mentioned steps:
- Firstly open QuickBooks.
- Then tap on “Reports”.
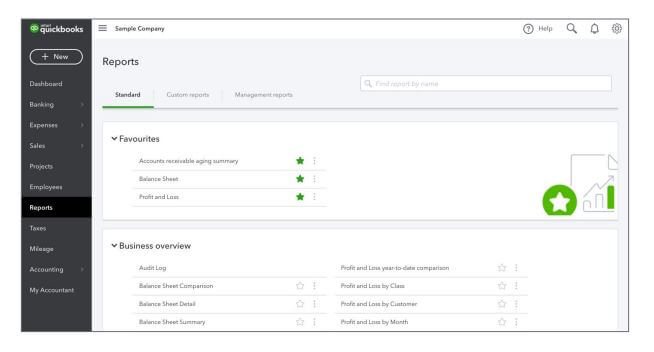
- Find your journal entry from the search bar.
- Tap on “Customize” and type the details.
- Click on “Run Report”.
- Click on “Print” to print your journal.
- Tap on “Export” to export the journal report in PDF or Excel form.
Also Read: QuickBooks Error QBWC1085: Easy Fixing Solutions for ALL
How to Delete the Journal Entry Mistakenly Created
If you’ve created an entry in your journal by mistake and you want to delete it to avoid Bank Feed Issues then follow the steps below. However, remember that it’s an irreversible process which means you will never be able to recover the sea entry again after deleting it.
Deleting Journal Entry In QBO
- Log in for “QuickBooks online” to make QuickBooks online Journal Entry
- Now navigate to “Settings”.
- Click “Chart of Accounts“.
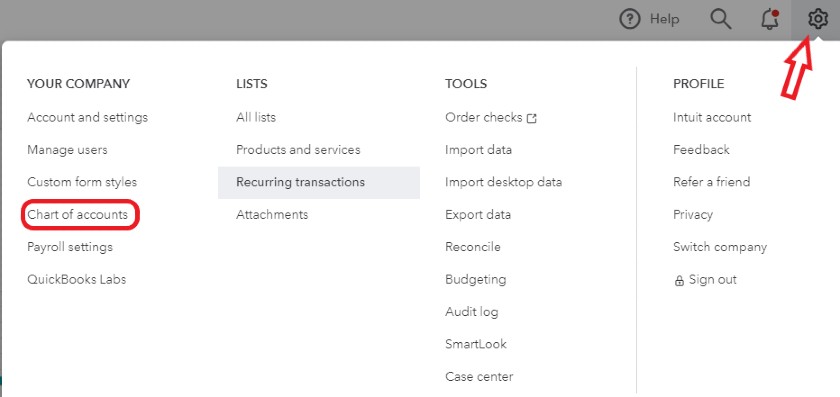
- Find the account you have set up for QuickBooks Journal Entry
- Once done, tap on the “View Register” or “Account History” option.
- Then, select the journal entry from “Account Register” You will find the “Journal” in the “Type” or “Ref No.” section.
- Now tap on journal entry to zoom the entry view.
- Click “Delete” and “Yes” to confirm the action.
Deleting Journal Entry on QuickBooks Desktop
The process of deleting a QuickBooks Journal Entry is different in Desktop and Online versions. Let’s first delete a journal entry in QuickBooks Desktop.
- First, open QuickBooks.
- Select “Company”.
- Then choose the option “Make General Journal Entry”.
- Now find the journal that you want to delete.
- Tap in the blank space of “Find”. Here, add the necessary details like Name, Amount Date, Entry Number, etc.
- After that, select the specific journal entry to reverse it.
- In the end, tap on “Save and Close”.
Tips: Those using Quickbooks Enterprise for Mac simply have to tap on “Edit” and choose “Delete General Journal”.
Deleting a General Journal Entry in QuickBooks Pro
It is natural that users can make mistakes while creating journal entries. These entries can be hidden or reversed. But it’s best to delete that journal entry. Below are the steps to remove journal entries in QuickBooks Pro:
- Open “QuickBooks”.
- Click on “Company”.
- Choose “Make General Journal Entries”.
- Tap on “Previous” or “Next” and find your journal entry.
- After finding your journal entry, tap on “Edit”.

- Here, choose “Delete General Journal”.
- Following this, you can hide the entries that can’t be deleted.
- To hide these entries, simply open your list and tap twice on it. After the new window is opened, mark the checkbox beside “X is inactive”.
- Now the list name will be displayed in “X”.
- In the end, click “OK” to save the changes.
QuickBooks Journal Entry is an essential transaction record in which the debit and credit column amount must be equal. Here, we have explained the detailed steps on how to create a journal entry in QuickBooks all versions.
We believe, now the concept of the journal entry is clear to you. Now you don’t need any expert assistance or high-tech knowledge for QuickBooks Journal Entry. Just follow these steps thoroughly and get it done!