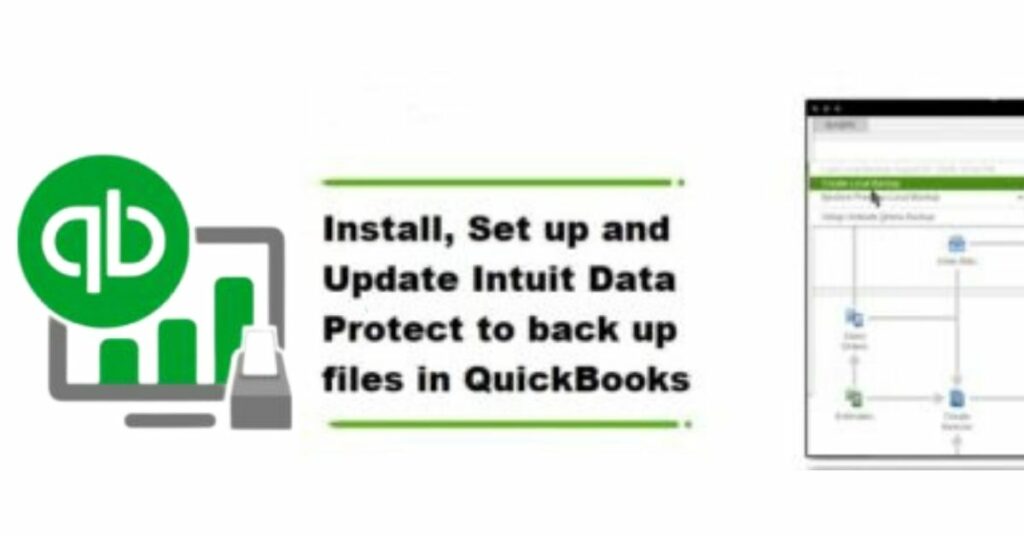
If you are an owner of a business, you must be thinking to keep your company data safe and secured. Company files and data are very important for your company’s growth. You don’t want to lose that data or miss the important company file. To keep your data safe and secured, Quickbooks provides you with the Intuit Data Protect. Intuit Data Protect gives the security and safety that you wanted for your company files. It provides you with a backup facility. It automatically takes a backup of your company file on a daily basis and protects it from virus, malware, or corruption threats.
As you know that to protect the data or file, you need the Intuit Data Protect. Then you probably want to download, install and set it up as soon as possible. In this article, we are going to discuss all the important information that will help you with all these processes.
 Intuit Data Protect is a tool that provides you the backup services for your company file. You can backup your Quickbooks folders or Files. However, you can also take a backup of your whole computer system. This tool also protects your file from malware, viruses, and any type of corruption or threats of losing the company files.
 Following are the steps that you need to follow in order to see the status of the backup.
Table of Contents
What is Intuit Data Protect?
 Intuit Data Protect is a tool that provides you the backup services for your company file. You can backup your Quickbooks folders or Files. However, you can also take a backup of your whole computer system. This tool also protects your file from malware, viruses, and any type of corruption or threats of losing the company files.
System Requirements for Download Intuit Data Protect
We are going to mention some system requirements that you must know before installing the Intuit Data Protect Tool.- IDP tool can work only on Windows. You require to install any windows version on your system.
- The tool IDP should download on that computer system that has your company file.
- Make sure that your system isn’t in the mode of hibernation.
- Ensure that you have the administrator access to that computer on which you want to install or set up the IDP.
- You have to install the QB full version in that system.
How to Install Intuit Data Protect on the Computer System?
You need to follow the below-mentioned steps to install the Intuit Data Protect.- To start with, You need to open QBs software.
- After that, navigate the File & hit the option Backup Company.
- Now, you need to enable the features of Online Backup.
- Then, use your Intuit Log in credential to log in to the IDP.
- After that, select the option continue.
- Now, you have to choose your QB file & then again hit continue.
- Tick the checkbox of Backup local selected documents & Click continue.
- Choose the files/ folders that you created for backup & hit continue.
- Thereafter, create a timetable for a daily backup & choose the continue option.
- Then, you need to change the settings of your notifications.
- Firstly, Launch QBs software.
- Open your IDP that is available in the right corner of the bottom.
- Now, hit the settings of change backup & hit the continue option until you get the settings page of Notification Email.
- At last, select from the appearing options according to your choice when you want to receive the mail notifications.
Why it is Crucial to Update Intuit Data Protect?
To protect yourself from a variety of online risks, you need to update your application protection. Also, it offers increased security, better and quicker performance, and information security.- Firstly, maintain the intuit data to protect download the latest version as it offers improved protection to secure important data and prevent data theft.
- Moreover, you may benefit from increased online application and tool speed.
- Another possibility is improved stability on different operating systems.
- Furthermore, the other advantage is to complete data security and prevention against data loss.
How to Set Up Intuit Data Protect Tool?
As you already know that updates are very important to experience the latest features of any tool. That’s why you should update your downloaded tool if the update is available. QuickBooks has updated the IDP when you enable the option of automatic update. You can download the update manually. For that, we are going to provide you with the steps that will help you to update your tool.- Firstly, you need to select the option Update QBs which is available within the help menu.
- Now, choose the tab update now.
- Then, you must choose the option Data Protect from the provided list.
- Hit Get Updates.
- The updating process starts and you have to wait until it’s done.
- Now, select Up Arrow from the toolbar of the desktop after completing the process.
- Right-click the IDP icon & select it. Now, you will notice the green padlock icon.
- After that, choose the option Update.
- Click Ok after completion of installing the updates.
Steps to Create a Backup a Company File
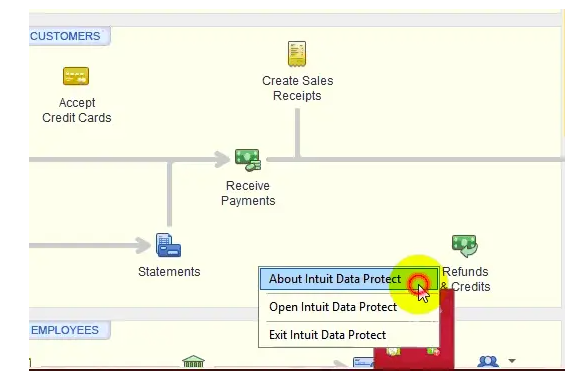
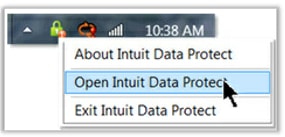
Here are the steps that you need to follow to back your company file.- At first, you need to open the IDP icon that looks like a green padlock.
- Choose the option open Intuit Data Protect.

- Thereafter, you must select the option Backup Now.
- After selecting it, you will receive a notification that says Backup is successfully done.
- Lastly, you need to hit OK.
Steps to View the Backup Status
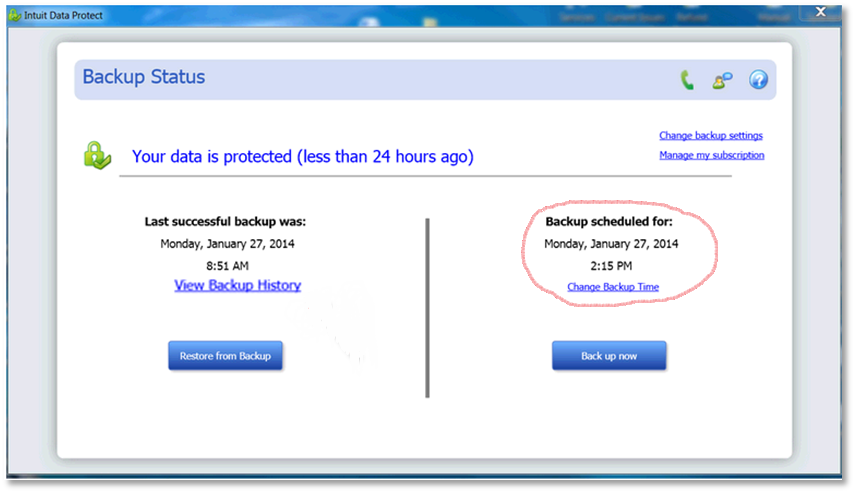 Following are the steps that you need to follow in order to see the status of the backup.
- To start with, look for the icon of Intuit Data Protect that looks like a green padlock.
- You need to right-click on it.
- After that, choose the option Open Intuit Data Protect.
- Now, choose the option View Backup History.
Steps to Restore the Backup
- At first, you need to open the IDP icon that looks like a green padlock.
- Now, choose the option Restore from the Backup.
- After that, you need to select the file that you want to restore.
- Hit the option continue & restore.
- The restoration process will start and it will overwrite your prior data.
- To ignore it, you need to hit the option overwrite.
Also Read: What is QuickBooks & How useful for Accounting Work?
Final Notes!
We have mentioned all the information related to Intuit Data Protect. Moreover, we have provided you with all the steps that you will need when you want to update your IDP or create a backup of your company file. We hope that this article is useful and helpful to you. In case you are stuck at any point, you can take support from an assistant.Frequently Asked Questions
Q1. Can I disable Intuit data Protect?
Intuit Data Protect (IDP) is a subscription-based service that helps to protect your data in the event of a system crash or other disaster. While the service can be very helpful, you can cancel your subscription anytime. Windows 7- Click on the Windows logo.
- Navigate to Startup Folder.
- Follow the path- C:\ProgramData\Microsoft\Windows\Start Menu\Programs\StartUp
- Right-tap on Intuit Data Protect and hit the option Delete.
Q2. Is there a fee for Intuit data Protect?
Intuit Data Protect is a subscription-based service that backs up your QuickBooks files. The subscription costs approximately $4.95 per month or $49.95 annually. Intuit Data Protect offers features like automatic backup and file restoration. With automatic backup, your QuickBooks files are backed up automatically on a schedule that you choose. You can also manually trigger a backup at any time. With file restoration, you can quickly and easily restore your QuickBooks files from a backup if they become corrupted or lost.Q3. How do I set up Intuit data Protect in QuickBooks desktop?
Steps to Setup Intuit Data Protect are:- Firstly, open QuickBooks and press F2 key.
- Click on File.
- Select a backup company.
- Activate online backup.
- Sign in with the same email that you used to log in Quickbooks.
- Select Continue after completing the set up.
- Choose the company file and click on Continue.
- Tick the checkbox against backup and hit the option Continue.
- Now choose the folders and files you want to backup. Click on Continue.
- You can also schedule the daily backup. Click on Continue again.
- To complete the process, set up the notification settings and tap on Continue.