

QuickBooks is advanced accounting software designed to provide a one-stop solution to all your bookkeeping and accounting needs. However, what if you need to export QuickBooks data to excel for a bit of number crunching? We will talk just about that in the course of this article. Before we move further, however, here is an ode to QuickBooks’ abilities to simplify the most complex accounting tasks.
No more cryptic clues
Just tie the laces of your shoes
And do away with your accounting blues
After that short poem, it’s time to get back to business and talk about how to export QuickBooks reports to Excel in the easiest way possible. The ease of functionality offered by QuickBooks becomes self-evident when you are told how easily you can import and export files between QuickBooks and Excel. Given the fact that Microsoft Excel used to be the mainstay for all your accounting needs traditionally, the utility of this feature will always remain understated.
Read More- How to download Quickbooks Desktop?
How to Export QuickBooks Data To Excel in Windows
Here is a step-by-step guide for exporting QuickBooks Desktop reports to Microsoft Excel for Windows PC
- Open QuickBooks> Go to Reports Menu> Click on Reports Center and open the report you wish to export
- Choose Excel from the options. Alternatively, you can also choose to save QuickBooks reports by sending a copy by Email or selecting the Print option to save a PDF version of the file.
- Before you export QuickBooks Data to Excel, if you need to add a new workbook to your existing files, you can create one by using the option to Create New Worksheet.
- In case you need to update a sheet before exporting it to Excel, choose the option to Update Existing Worksheet and browse to select the file to update.
- To access advanced options to format data as per your needs, choose the Advanced option
- An example of the utility of this option is visible when you try to save a QuickBooks report with more than 256 columns. In this case, you can choose the Advanced option and look for the Space between columns option and uncheck it before selecting OK.
Read More- How to Backup and restore Quickbooks Data?
Note: Usually, a report is only allowed to have less than 256 columns in Excel. This is why you may get a warning about too many columns in your worksheet while trying to export QuickBooks reports to Excel. You can use the option we have described above or you can save files in CSV format instead of as an Excel sheet. This will allow you to have more columns in your sheet without causing any issues.
How To Export QuickBooks Data To Excel For Mac
- Open QuickBooks>Reports menu> choose Export and select the file you want to export
- Now Select Save As and choose the location to save the Excel version of the file.
- QuickBooks automatically opens any Excel sheet in the application chosen as the default option.
- To change this default option, right-click on your chosen file and look for Get Info option
- Go to the Open With menu and choose the app with which you want to view the file.
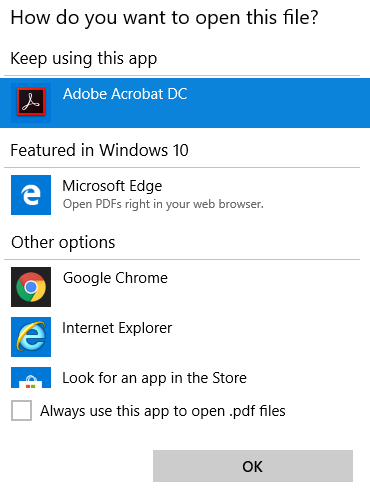
- If you are working with a Mac, you can choose Apple Numbers instead of Microsoft Excel.
- Next, select the option Change All
This should change the default option to Apple Numbers. It would allow you to view and edit all your files in the native application on Mac. You no longer need to wonder how to export QuickBooks data to Excel on a Mac and can view and edit your files with a high level of efficiency.
Note: To access Excel Worksheets on a Mac, you need Apple Numbers v3.5 or Microsoft Excel 2016 or a later version. You can also use Mac Office 365 to access Excel files.
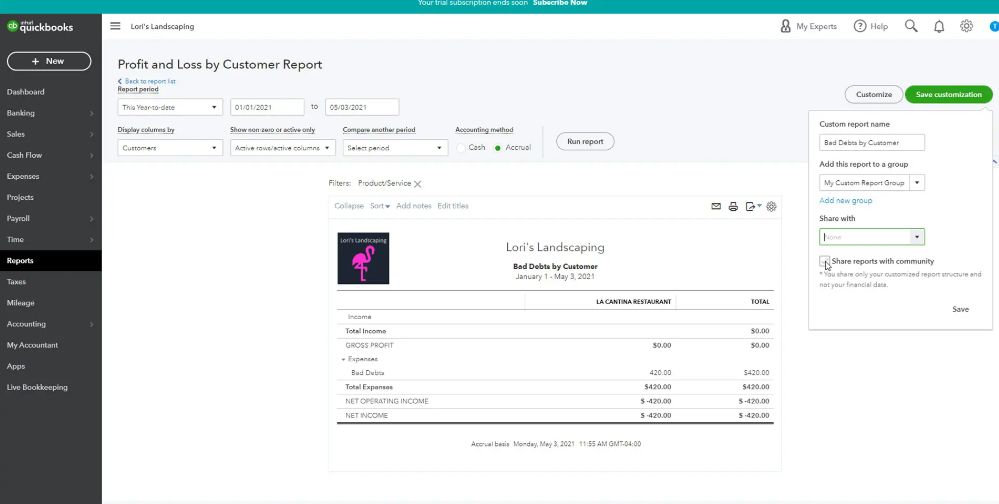
How To Export Data From QuickBooks Online To Excel
QuickBooks Online is yet another version of this ingenious accounting app that lets you take total control of your business bookkeeping without any hassle. Next, we will take a look at how to export QuickBooks data to Excel if you are using QuickBooks Online version. Just follow these steps to use the available options in QuickBooks Online.
- Look for the Business overview option in the online version and select Reports.
- Next, choose the file you want to export. Over the report selected, you can see the Export icon.
- Select Export To Excel
- Now, simply choose the location to save the file, and you are done,
If you are unable to view or access all your data in Excel files, make sure you are not viewing it in Protected View. You need to choose Enable Editing to view all the contents of your files.
Summing Up
As you have seen, it is pretty easy to export QuickBooks data to Excel using in-app options. You can also easily modify the file format to have more columns or choose to save the file in other formats as well. QuickBooks also allows you full flexibility to export files on Windows or Mac versions and view or edit reports as you find convenient with a view to helping improve the level of your accounting efficiency.